
You stare at the cursor blinking in an empty email. You know what you want to say. You just don't want to type it.
Mac dictation has been around since 2012, and most people gave up on it years ago. AI voice dictation for Mac is what changed that in the last 18 months. The old "talk into a microphone and watch a wall of typos appear" experience got quietly replaced with something that actually feels like writing.
Here's the part most articles skip. The hard part isn't transcription anymore, that's been solved. What changed is the layer on top, the one that takes your rambling thoughts and turns them into clean text before it ever hits your screen. This article walks through the full pipeline, step by step, so you can see what your Mac is actually doing between the moment you start speaking and the moment polished text lands in your draft.
Why Dictation on Mac Finally Feels Usable
Two numbers explain why people are coming back to dictation. The average person types around 40 words per minute. The average person speaks at around 150. That's roughly four words spoken in the time it takes to type one.
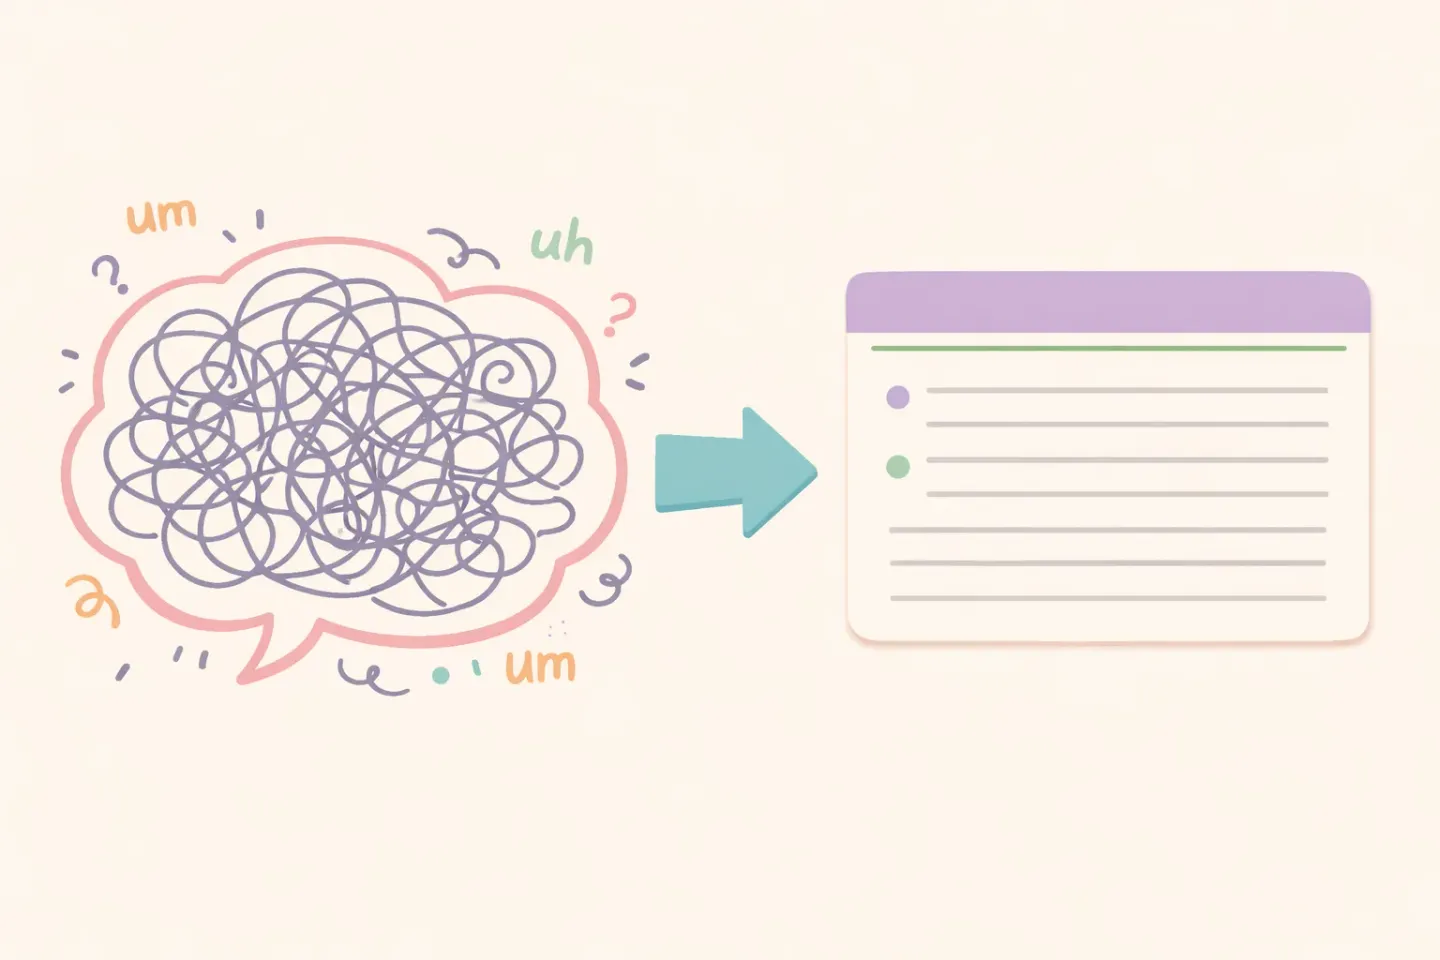
But speed was never really the problem. The problem was the output. Old dictation handed you a literal transcript of every uh, every restart, every "wait, no, scratch that." You'd save 30 seconds dictating and spend 90 cleaning it up.
Modern AI dictation apps fixed this by adding a second step. Speech goes through transcription, like before. Then it gets handed to a language model that rewrites it the way a tidy editor would. Filler stripped. Grammar fixed. Sentences finished. By the time text appears on your screen, it reads like something you wrote on a good day.
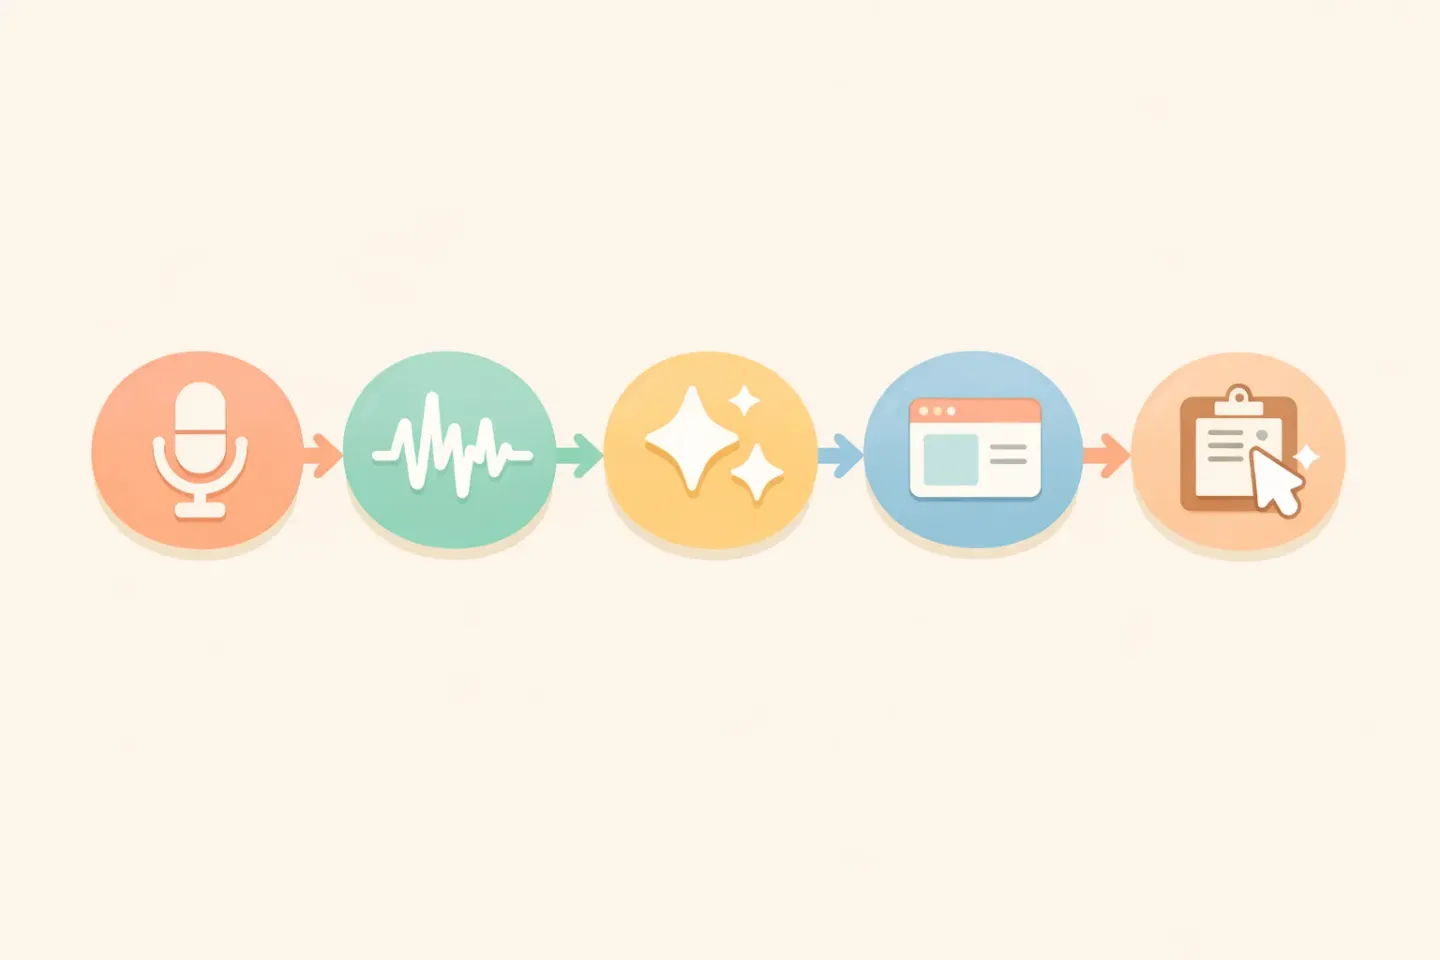
The Five Steps Behind AI Voice Dictation on Mac
The pipeline is short. Five steps, most of them invisible: 1. Capture, where your Mac picks up your voice. 2. Transcribe, where audio becomes raw text. 3. Polish, where the raw text gets cleaned up by an AI model. 4. Apply context, where the writing style adapts to where the text is going. 5. Deliver, where polished text lands at your cursor.
Each step has its own model, its own tradeoffs, and its own places it can go wrong. Worth understanding one at a time.
Step 1: Capture, How Your Mac Picks Up Your Voice
This part isn't fancy. You press a hotkey (FN, Option+Space, or whatever the app uses) and the microphone starts listening. The app records audio into memory, usually at 16-bit, 16 kHz, the format that the transcription model expects.
Most modern Mac dictation apps don't use voice activity detection to start and stop. They use the hotkey. Hold to talk, release to stop. The reason is reliability. Voice detection on the open mic of a coffee shop is a coin flip. A keypress is not.
A few things happen during capture that you don't see. The audio is buffered, often noise-suppressed using Apple's built-in audio framework, and segmented into chunks. If you talk for longer than the chunk size, usually 30 seconds, the app may split the recording before sending it on.
Step 2: Transcription, How Whisper Turns Sound Into Words
This is where most AI Mac dictation apps converge on one piece of technology: OpenAI's Whisper model. Whisper is a speech recognition system trained on around 5 million hours of audio in 99 languages. The current version, large-v3, hits about 2.7% word error rate on clean English audio and 8 to 12% on noisy real-world recordings.
In plain terms: speak naturally and roughly 92 to 97 percent of words will be transcribed correctly out of the box. That's a different category of accuracy from what Apple's original dictation engine could do, which is why third-party apps took off.
Here's roughly what Whisper does to your audio: - Chops the recording into 30-second chunks. - Converts each chunk into a spectrogram, a visual representation of sound across frequencies and time. - Feeds the spectrogram into a neural network that has learned to map audio patterns to words. - Also predicts the language, punctuation, and where sentences end.
The model can run locally on your Mac (Apple Silicon handles it comfortably) or in the cloud. Local is private and works offline. Cloud is faster on older hardware and supports bigger models. Many apps let you pick.
What you get at the end of this step is a raw transcript. Punctuated, mostly accurate, often a little messy. This is where Apple's built-in dictation stops. The interesting apps don't.
Step 3: Polishing, The Layer That Changed Everything
This is the step that flipped Mac dictation from "kind of useful" to "I haven't typed an email in weeks."
After transcription, the raw text gets sent through a language model, usually GPT-4 class or Claude, with an instruction like: ``` Rewrite this as polished, professional text. Remove filler words and false starts. Keep the meaning. Don't add anything. ```
Here's what that looks like in practice.
What you spoke
*"Okay so um, I wanted to follow up on, uh, the proposal from last week. I think, you know, we should probably move ahead with option two? Yeah, option two. Can you, can you send me the contract by Friday?"*
What lands in your clipboard
*"Following up on last week's proposal, I'd like to move ahead with option two. Could you send me the contract by Friday?"*
Same meaning. Different reading experience. And it happened in under two seconds.
This is the part that's hard to describe until you try it. You stop thinking about how you sound. You stop self-editing while you speak. You just say the thing, the way you'd say it to a colleague, and what comes out is the version you would have written if you'd had time.
If you're already dictating but losing time to cleanup afterward, this is the gap that Voicr fills. Hold FN, talk however you want, and what hits your clipboard is already polished. No second pass, no "I need to fix that one sentence," just clean text ready to paste.
Step 4: Context Awareness, Different Styles for Different Apps
This step is newer. It's also the one that separates the better Mac dictation apps from the merely competent.
A polite, formal tone is right for a client email. It's weird in a Slack message to your teammate. It's wrong in code comments. A good dictation app figures out which app you're in and adjusts.
The mechanism is simple. The app reads which application has focus. It looks up your saved style rule for that app. Then it folds that rule into the prompt that goes to the polishing model.
A Slack rule might say: ``` Keep it casual and brief. No corporate phrasing. Use contractions. One or two short sentences max. ``` An email rule might say: ``` Write in a professional tone. Full sentences. Add a greeting and sign-off if the content warrants it. ```
Same voice input. Two very different outputs depending on which window is open. You don't toggle anything. You just talk, and the right tone comes out.
Step 5: Delivery, How Text Lands Where You Need It
The last step is the one that took the longest to get right. You've got polished text. Now how does it get into your active text field?
There are two common approaches: 1. Clipboard route. The app copies the polished text to your clipboard, then triggers a paste command (Cmd+V) through macOS Accessibility APIs. Fast, reliable, works in nearly every app. 2. Keystroke injection. The app simulates typing each character one at a time, using a tool like AppleScript or the same Accessibility framework. Slower, but it works in apps that block paste (some banking websites, certain remote desktops, password managers).
Most apps default to clipboard paste and fall back to keystroke injection only when necessary. The result, from your point of view: text appears at your cursor about half a second after you release the hotkey. No app switching, no copy step, no review.
Local vs Cloud Processing: What's Actually Happening
A question that comes up a lot: where does my voice go?
There are two real options. Local processing runs the Whisper model on your Mac. Your audio never leaves the device. On Apple Silicon (M1 onwards), local Whisper runs fast enough for real-time dictation, usually under a second of lag. The tradeoff: the polishing step still typically goes to a cloud model, because running a 70-billion-parameter language model locally isn't realistic for most laptops. Some apps offer fully local with a smaller polishing model at a quality cost.
Cloud processing sends both the audio and the polishing step to a remote API. Faster on older Macs, supports the largest and most accurate models. The tradeoff is privacy. Your speech leaves your device, even if it's deleted right after transcription.
For most people, "local Whisper, cloud polishing" is the right default. For anyone working with sensitive material (medical notes, legal drafts, internal company data), fully local is worth the small quality hit. A good app lets you choose per-recording or set a default.
Where AI Dictation Still Trips Up
Honest section. The pipeline is good. It's not perfect.
Homophones still go wrong. "Their" vs "there" vs "they're" gets the right one most of the time but not always. Polishing usually catches it from context, but not if the surrounding sentence is ambiguous.
Proper nouns and jargon are hit or miss. Whisper has seen most common names and tech terms, but it'll mangle anything specialized. Pharmaceutical names, code library names, your colleague's unusual surname. Some apps let you add a custom dictionary that gets bolted onto the prompt.
Noisy environments degrade accuracy fast. Whisper handles café noise surprisingly well, but a phone ringing two feet away or someone talking nearby will pull words out of your transcript.
Long monologues drift. The model is excellent in 10-to-30-second bursts. Past about 90 seconds, it sometimes loses the thread, repeats fragments, or skips short phrases. The fix is just to stop and start the recording in chunks.
These limits matter when you're getting started. None of them are dealbreakers if you know they exist. If you're choosing between options, our guide to the best voice-to-text apps for Mac walks through how the major apps handle these tradeoffs.
How to Start Using AI Voice Dictation on Your Mac Today
Three practical steps, in order.
1. Pick one task to dictate every day for a week. Email is a good starter, it has the highest typing-to-talking conversion (you usually think before you write anyway). Don't try to dictate everything at once. You'll quit.
2. Get comfortable talking to nobody. The first few times you dictate, you'll feel weird talking out loud in a quiet room. That goes away in about four days.
3. Pick an app and commit. There are good options across the price range, from Apple's built-in dictation to open-source Whisper tools to full-pipeline apps. If you want the polished transcribe-and-paste flow described above, Voicr does exactly that. Hold FN, speak, paste. Whisper for transcription, a strong language model for polishing, and per-app writing styles that adapt to wherever your cursor is. The free tier gives you 5,000 words a month with no credit card.
The pipeline behind all of this is finally good enough that dictation isn't a compromise anymore. You're not trading quality for speed. You're getting both. The hard part is just deciding to stop typing.